Introduction: Taking Control of Your Edits
Presets are powerful tools. They can transform your photos with a single click. However, sometimes a preset just doesn’t quite fit. You might apply it and realize it’s too strong, or it changes your image in an unexpected way. Understanding how to remove a preset from a photo in Lightroom is a fundamental skill. It gives you back control over your creative vision. This guide will walk you through all the methods to undo, reset, or fine-tune your images, ensuring your photos always look their best in 2025.
We’ll cover everything from simple undo commands to advanced local adjustments. You’ll learn how to reverse a preset’s impact completely. You’ll also discover how to selectively reduce its effects. Mastering these techniques will elevate your photo editing workflow. It will make you a more confident editor.
Understanding Presets in Lightroom
Before we dive into removal, let’s quickly define what a preset is. A preset is a saved collection of adjustments. These adjustments can include exposure, contrast, white balance, color grading, and more. When you apply a preset, Lightroom instantly applies all these saved settings to your photo. It’s a huge time-saver for consistent looks. However, a preset is not a permanent filter. It’s simply a starting point for your edits. All the adjustments are still there. You can change them at any time.
The Core Concept: Presets Don’t ‘Stick’ Permanently
This is a crucial point. When you apply a preset, Lightroom doesn’t bake it into the image file. Instead, it applies a series of individual adjustments. These adjustments are non-destructive. This means your original photo data remains untouched. You are free to modify or remove any of these adjustments. This flexibility is what makes Lightroom so powerful. It also makes it easy to learn how to remove a preset from a photo in Lightroom.
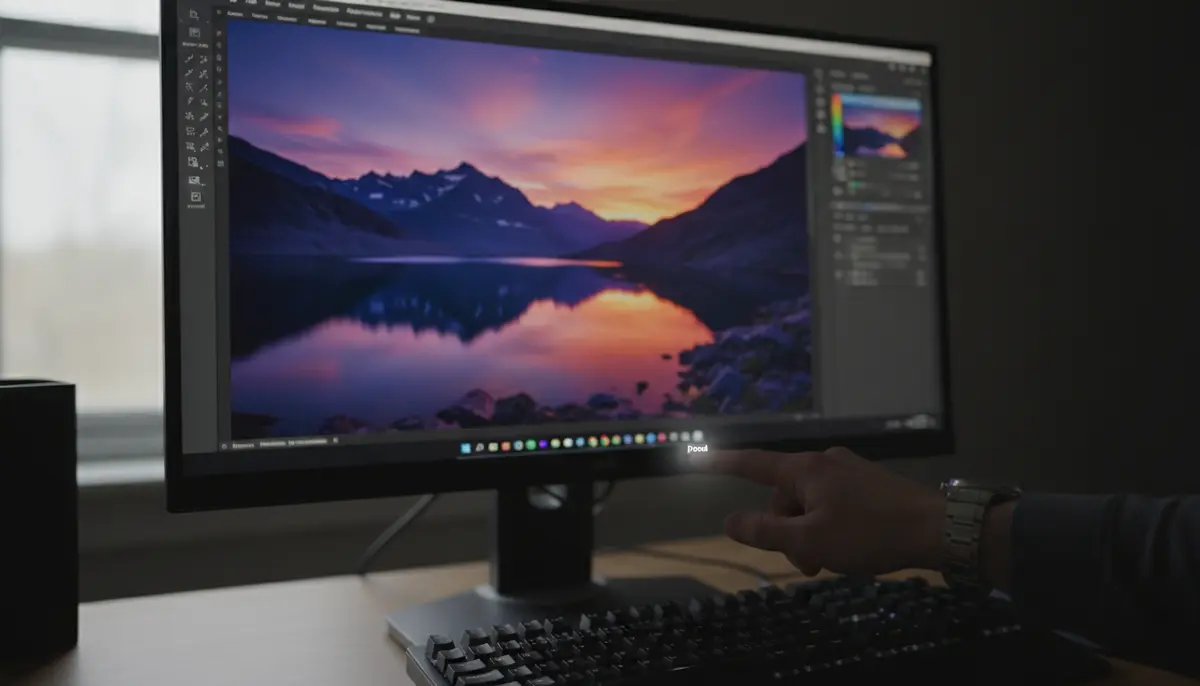
Method 1: The Quickest Fix – Undo and History Panel
Sometimes, you apply a preset and immediately know it’s wrong. The quickest way to reverse this is often the simplest: the Undo command. This is your first line of defense when figuring out how to remove a preset from a photo in Lightroom.
Using the Undo Command (Ctrl+Z / Cmd+Z)
- After applying a preset, if you want to immediately undo it, simply press Ctrl+Z (Windows) or Cmd+Z (Mac) on your keyboard.
- This shortcut reverses the last action you performed. If applying the preset was your very last action, it will be undone.
- You can press it multiple times to go back through several steps. This is very helpful for quick corrections.
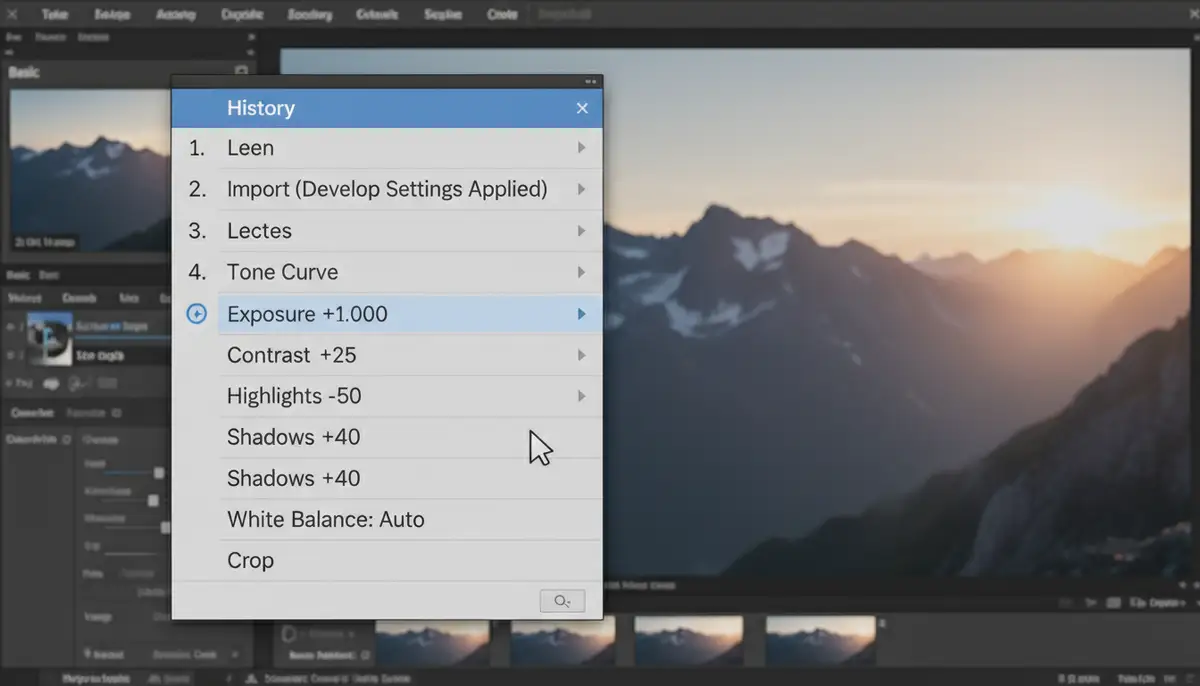
Leveraging the History Panel
The History panel is a powerful tool in Lightroom. It records every single adjustment you make to a photo. Think of it as a detailed log of your editing journey. If you applied a preset a while ago and performed other edits since, the Undo command might not be enough. This is where the History panel comes in handy. It offers a more precise way to remove a preset from a photo in Lightroom, even after many other changes.
- Locate the History panel: In the Develop module, look at the left-hand panel. You’ll find ‘History’ near the bottom.
- Open the panel: Click on ‘History’ to expand it. You will see a list of all your edits, from the very first import to your latest adjustment.
- Find the preset application: Scroll through the list to find the step where you applied the preset. It will often be labeled with the preset’s name.
- Click to revert: Click on the step before the preset was applied. Your photo will revert to that exact state. All subsequent edits, including the preset, will be removed.
The History panel is non-destructive. You can always click on a later step to bring back your edits if you change your mind. It’s a safe way to experiment. For more detailed discussions on reverting changes, you might find valuable insights in community forums like how to unset a preset on Lightroom Queen, which discusses similar scenarios.
Method 2: Resetting All Adjustments to Default
What if you want to completely wipe the slate clean? Perhaps you applied a preset, then made several manual adjustments, and now you just want to start over from scratch. Lightroom provides a simple way to reset all edits. This is another effective method for how to remove a preset from a photo in Lightroom, along with any other changes.
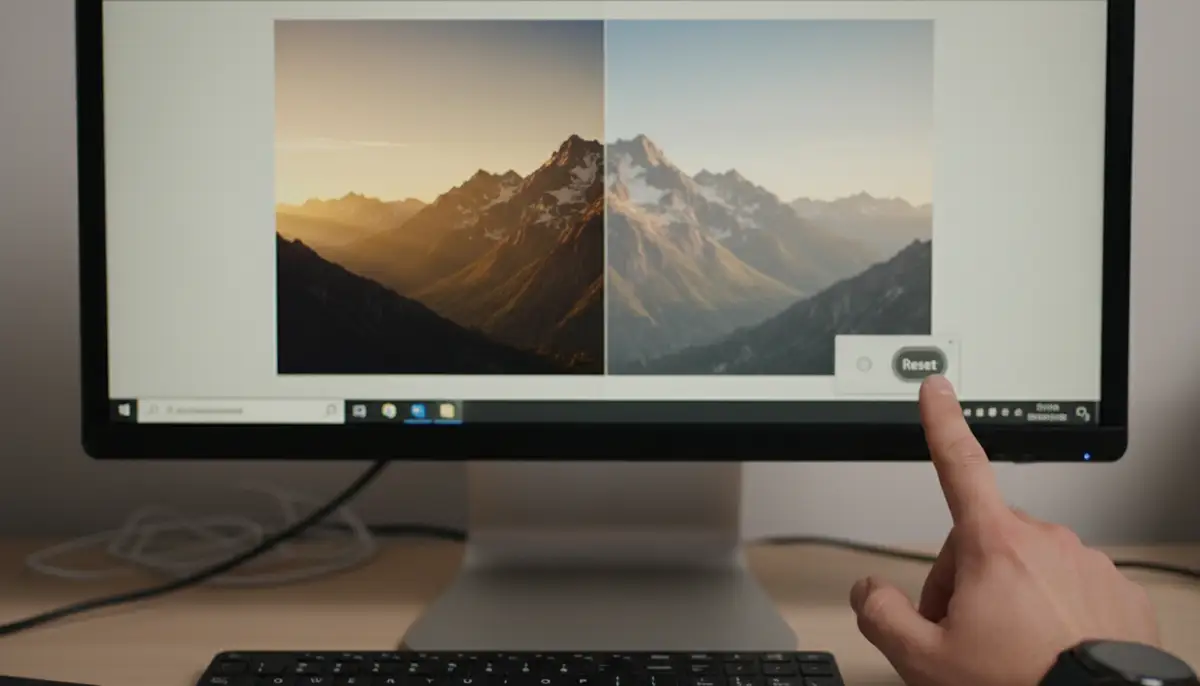
Resetting to Lightroom Defaults
- In the Develop module, look for the ‘Reset’ button. It’s typically located at the bottom right of the panels, or sometimes in the top right, depending on your Lightroom version (Classic vs. Cloud).
Clicking this button will revert your photo to its original imported state. This means all adjustments, including any applied presets, will be removed. It’s like your photo just entered Lightroom for the first time. This is the ultimate ‘undo everything’ button. It’s perfect when you want to learn how to remove a preset from a photo in Lightroom and all subsequent edits.
Resetting to Camera Raw Defaults
Lightroom also offers an option to reset to Camera Raw defaults. This is slightly different from the general ‘Reset.’ It applies Adobe’s default processing settings for your camera model. This can be useful if you’ve changed Lightroom’s default import settings for your camera. To do this, hold down the Alt (Windows) or Option (Mac) key. The ‘Reset’ button will change to ‘Reset Camera Raw Defaults.’ Click it to apply.
| Reset Option | What It Does | When to Use |
|---|---|---|
| Reset (Default) | Removes all edits and presets, returning to original imported state. | When you want to start all over from scratch. |
| Reset Camera Raw Defaults (Alt/Option + Reset) | Applies Adobe’s default processing settings for your camera. | When you want to revert to a standardized Adobe starting point, ignoring user-defined import settings. |
For more advanced options on managing default settings, the Adobe Community has discussions like removing a preset from all photos, which delves into setting and restoring default settings, a powerful way to manage your starting points.
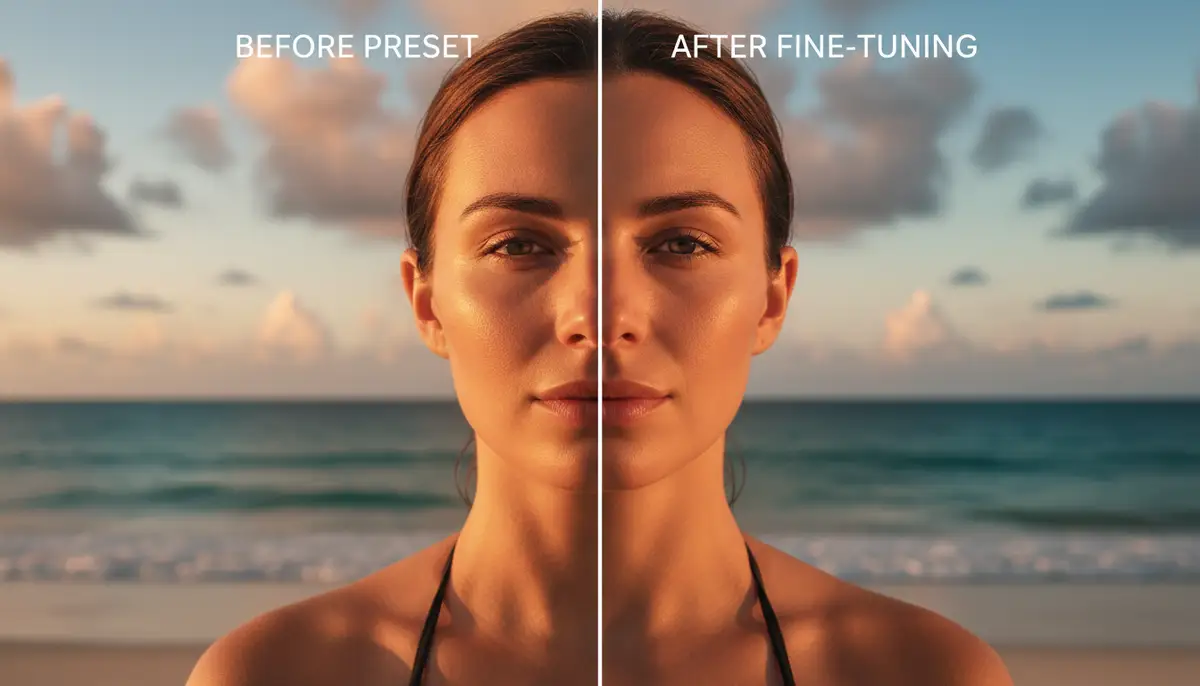
Method 3: Manually Adjusting Preset Settings (Fine-Tuning)
Sometimes, you don’t want to completely remove a preset from a photo in Lightroom. Instead, you just want to dial back certain aspects of it. Maybe the colors are too saturated, or the contrast is too high. Since a preset is just a collection of adjustments, you can manually change any of those individual settings. This offers the most control.
Adjusting Basic Panel Settings
The Basic panel is where many common preset adjustments live. After applying a preset, look at the sliders here:
- Exposure: If the photo is too bright or dark, adjust this.
- Contrast: Reduce if the image looks too harsh.
- Highlights/Shadows/Whites/Blacks: Fine-tune these to recover detail or adjust dynamic range.
- Temperature/Tint: Correct color casts if the preset made the photo too warm, cool, green, or magenta.
- Saturation/Vibrance: Reduce if colors are too intense.
Simply drag the sliders to your liking. This effectively modifies the preset’s impact without fully removing it. This is a nuanced way to handle how to remove a preset from a photo in Lightroom, focusing on specific elements.
Delving into Tone Curve, HSL/Color, and Split Toning
Presets often make significant changes in these areas. If you want to know how to remove a preset from a photo in Lightroom by targeting specific color or tone shifts, these panels are key.
- Tone Curve: This controls the overall brightness and contrast of different tonal ranges. A preset might introduce an S-curve for contrast. You can flatten it or adjust points to your preference.
- HSL/Color: This panel allows you to adjust the Hue, Saturation, and Luminance of individual colors. If a preset made blues too vibrant, you can reduce the saturation for blue here.
- Split Toning: Presets often add color to highlights and shadows. If you don’t like the effect, simply drag the ‘Saturation’ sliders for Highlights and Shadows down to zero in this panel.
By understanding which panels a preset affects, you gain granular control. This allows you to selectively modify or essentially ‘remove’ only the parts of the preset you dislike.
Method 4: Using Local Adjustments to Mitigate Preset Effects
Sometimes, a preset looks great on most of your photo, but it’s too intense in specific areas. For example, a portrait preset might over-soften the background or make skin tones too warm. This is where local adjustment tools become invaluable. They allow you to selectively remove a preset from a photo in Lightroom, but only in certain parts of the image.
The Power of the Adjustment Brush
The Adjustment Brush lets you ‘paint’ adjustments onto specific areas of your photo. If a preset made an area too bright, you can use the brush to darken it. If colors are too saturated in one spot, you can desaturate that specific area. Here’s how:
- Select the Adjustment Brush: In the Develop module, click on the brush icon (K on your keyboard).
Now, you have a set of sliders similar to the Basic panel. You can set them to negative values. For example, if the preset added too much exposure to a face, set the brush exposure slider to a negative value. Then, paint over the face. This will reduce the exposure only where you paint, effectively removing the preset’s effect in that spot.
Radial and Graduated Filters
These tools work similarly but apply adjustments in a gradient or a circular/elliptical shape. If a preset made your sky too dark, you could use a Graduated Filter to lighten it. If a preset over-processed a subject in the center, a Radial Filter can help. You can use these to selectively remove a preset from a photo in Lightroom for specific regions.
For example, if you applied a preset that made the entire image moody, but you want a specific object to stand out with more natural colors, you could use a Radial Filter. Set the filter’s saturation and contrast sliders to reduce the preset’s effect within that circle. This is a smart way to manage complex edits. The Adobe Community has great discussions on this, such as how to erase a preset from select areas, which details using radial tools for this exact purpose.
Method 5: Managing and Deleting Presets
Sometimes, the issue isn’t just how to remove a preset from a photo in Lightroom, but rather that you don’t like the preset itself. If a preset consistently gives you undesirable results, or you simply don’t use it anymore, you can delete it from your Lightroom library. This keeps your preset panel clean and organized.
Deleting Individual Presets
- Navigate to the Presets panel: In the Develop module, look at the left-hand panel and expand ‘Presets’.
- Find the preset: Locate the preset you wish to delete.
- Right-click (Ctrl-click on Mac) on the preset’s name.
- Select ‘Delete’: From the context menu, choose ‘Delete’. Lightroom will ask for confirmation. Confirm to remove it.
Once deleted, the preset will no longer appear in your list. However, deleting a preset does NOT affect photos where it was previously applied. It only removes the option to apply it in the future. You would still need to use one of the methods above to remove a preset from a photo in Lightroom that already has it applied.
Organizing Your Presets
A cluttered preset panel can slow down your workflow. Consider creating folders to organize your presets by style, type, or creator. You can also hide presets you rarely use. This makes finding your favorites much easier. A clean workspace helps you focus on your creative work. It also helps you avoid applying presets you might later want to remove.
Keeping your Lightroom catalog tidy is essential for efficient editing. Watch this helpful video on
to learn more about optimizing your workspace and managing your assets.
Best Practices for Using and Removing Presets
Knowing how to remove a preset from a photo in Lightroom is just one part of the equation. Developing smart habits around preset usage can save you time and frustration. Here are some tips for 2025.
Treat Presets as a Starting Point
Never think of a preset as the final step. It’s a foundation. Apply a preset, then evaluate its effect. From there, make manual adjustments to tailor it to your specific image. Every photo is unique. A one-size-fits-all approach rarely yields perfect results. This mindset makes it easier to decide if you need to remove a preset from a photo in Lightroom or just tweak it.
Batch Processing with Caution
Presets are fantastic for batch processing. You can apply the same look to hundreds of photos at once. However, always review your batch. Even if photos are from the same shoot, lighting conditions can vary. You might need to go back and manually adjust or even remove a preset from a photo in Lightroom for individual images within the batch. Quality control is key.
Experiment and Learn
Don’t be afraid to try different presets. See how they affect your images. When you find one you like, study its individual adjustments in the panels. This helps you understand why it works. This knowledge empowers you to create your own presets or modify existing ones with confidence. It also makes it easier to understand how to remove a preset from a photo in Lightroom by knowing its underlying components.
For those interested in exploring more about photo aesthetics and visual storytelling, you might enjoy learning how to take a photo of your eye like a pro in 2025. Understanding different photographic techniques broadens your editing perspective.
When to Choose an Alternative Editing Tool
While Lightroom is a powerhouse, other apps offer different approaches. Sometimes, you might find that a simple, quick edit for social media doesn’t require Lightroom’s depth. Apps like picsart.com, vsco.co, or snapseed.online offer excellent mobile editing experiences with their own sets of filters and tools. These can be great for on-the-go adjustments, though they might not offer the same granular control for how to remove a preset from a photo in Lightroom’s desktop environment.
For instance, if you’re looking to quickly add some flair to your social media posts, you might also be interested in a guide on how to get the new fonts on Instagram. This can complement your photo editing skills by enhancing your overall content presentation.
Enhancing Your Photography Workflow with Camera ZOOM FX
As you master advanced editing techniques in Lightroom, remember that a great edit starts with a great photo. For Android users, Camera ZOOM FX offers professional controls and fast shooting performance. It helps you capture high-quality results right from your phone. This means you start with a stronger base image. A better original photo often requires less heavy-handed editing later. It reduces the need to completely remove a preset from a photo in Lightroom, as your initial image is already well-composed and exposed.
With Camera ZOOM FX, you can focus on getting the shot right in-camera. This minimizes the post-processing effort. It lets you spend less time fixing and more time refining your artistic vision. It’s about achieving stunning results efficiently. This powerful photography app empowers you to take stunning photos that truly stand out, making your Lightroom workflow smoother and more creative.
Conclusion: Full Control Over Your Lightroom Edits
Knowing how to remove a preset from a photo in Lightroom is an essential skill for any photographer. It empowers you to correct mistakes, refine your vision, and truly master your images. Whether you use the simple Undo command, the powerful History panel, the comprehensive Reset options, or precise manual adjustments, you have complete control. Remember, presets are tools, not rules.

Embrace the flexibility that Lightroom offers. Don’t be afraid to experiment with different looks. Always remember that you can always revert or adjust any change. Your creative journey is about finding your unique style. Mastering these techniques ensures your photos always reflect that vision. You now have all the knowledge to confidently remove a preset from a photo in Lightroom and sculpt your images to perfection.