In the world of digital photography and creative editing, transforming your images can unlock incredible artistic potential. One powerful technique is color inversion. It completely flips the color spectrum of your photo, turning light areas dark, dark areas light, and replacing each color with its opposite. This can create surreal, dramatic, or even spooky effects. If you’ve ever wondered how to achieve this captivating look, you’re in the right place. This guide will show you exactly how to invert colors on PicsArt, one of the most popular and versatile photo editing apps available today.
PicsArt makes complex editing simple. By the end of this article, you will master how to invert colors on PicsArt, turning your ordinary photos into extraordinary visual statements. We’ll cover everything from the basic steps to advanced creative applications, ensuring your images stand out in 2025.
Understanding Color Inversion and Its Creative Uses
Color inversion is a fundamental image manipulation technique. It swaps each color in an image with its complementary color. For example, red becomes cyan, green becomes magenta, and blue becomes yellow. White turns to black, and black turns to white. This process fundamentally alters the mood and aesthetic of any photograph.
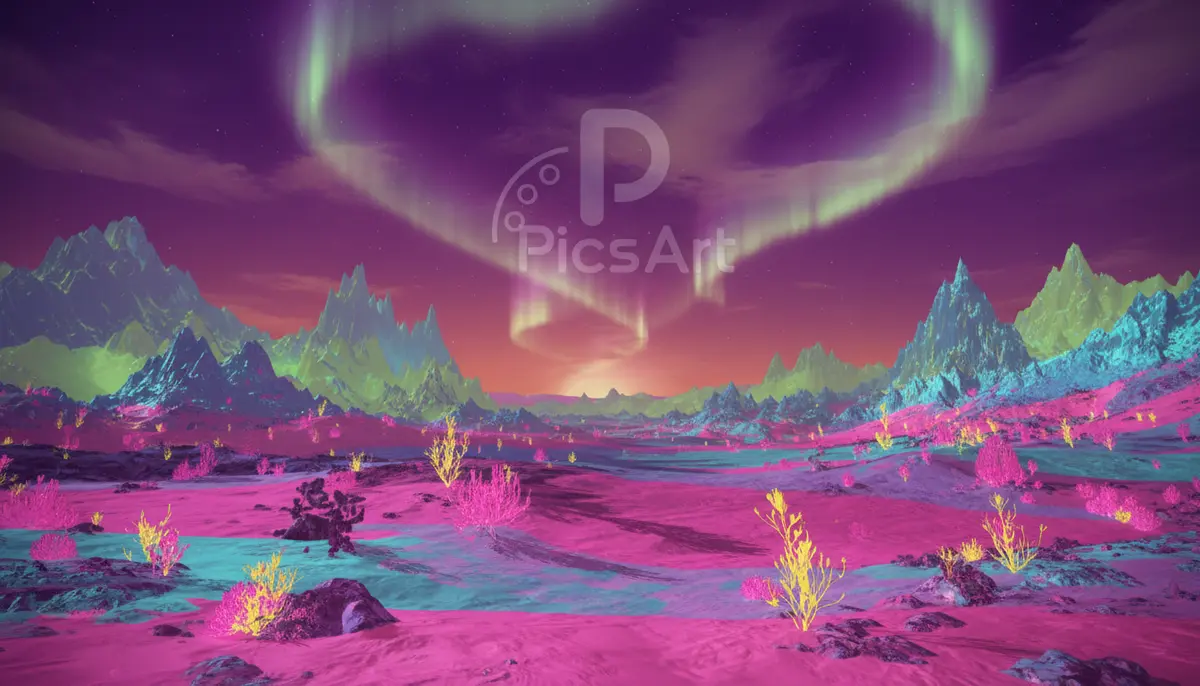
Why would you want to invert colors? The reasons are diverse. Artists often use it to create abstract or surreal compositions. It can give a photo a vintage negative film look, or even an eerie, otherworldly vibe perfect for Halloween themes. Designers might use it to generate unique color palettes or to make text stand out against a busy background. Some even use it to create a ‘thermal’ effect, making objects appear as if seen through a heat camera. Apps like PicsArt, Afterlight, and Snapseed all offer robust tools for such transformations, but PicsArt’s user-friendly interface often makes it a preferred choice for many.
Understanding the impact of color inversion is the first step. Once you grasp the concept, you’ll see endless possibilities. This knowledge will empower you as you learn how to invert colors on PicsArt effectively.
Step-by-Step Guide: How to Invert Colors on PicsArt
Let’s dive into the practical steps. Learning how to invert colors on PicsArt is straightforward. Just follow these simple instructions, and you’ll be transforming your images in no time.
Getting Started with PicsArt
First things first, make sure you have the PicsArt app installed on your smartphone or tablet. It’s available for both iOS and Android devices. If you haven’t downloaded it yet, head to your app store. Once installed, open the app.
When you launch PicsArt, you’ll see a large purple ‘+’ icon at the bottom of the screen. Tap this icon to start a new project. You can then choose to edit a photo from your gallery, use a template, or start with a blank canvas. For this tutorial, select ‘Photos’ and pick the image you wish to invert.
Navigating to the Effects Menu
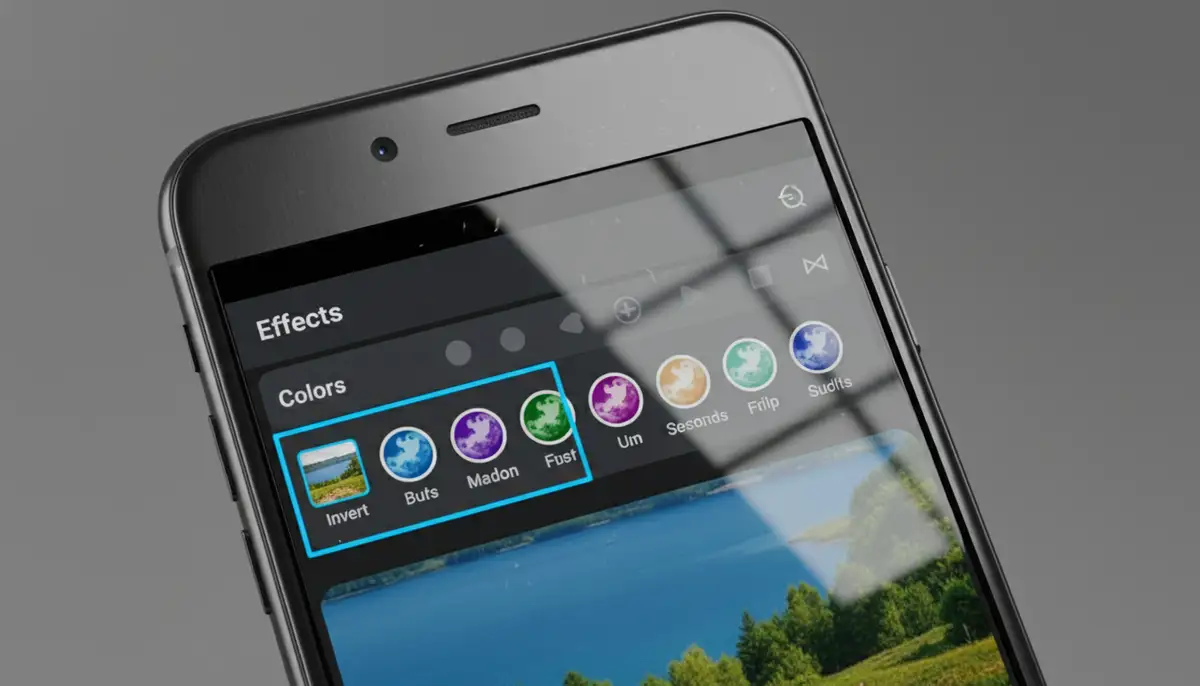
Once your photo is loaded into the PicsArt editor, you’ll see a row of tools at the bottom of your screen. These tools include options like ‘Tools,’ ‘Effects,’ ‘Retouch,’ ‘Sticker,’ and more. To invert colors, you need to access the ‘Effects’ menu. Look for the ‘fx’ icon, which represents ‘Effects,’ and tap it.
Tapping ‘Effects’ will open a new menu with various filter categories. You’ll see options like ‘Magic,’ ‘Blur,’ ‘Artistic,’ and ‘Colors.’ This is where the magic happens for color inversion. Knowing this navigation is key to understanding how to invert colors on PicsArt.
Applying the Invert Effect
Within the ‘Effects’ menu, scroll through the categories until you find ‘Colors.’ Tap on ‘Colors’ to reveal a range of color-related filters. Here, you’ll see options like ‘Saturation,’ ‘Hue,’ ‘Colorize,’ and crucially, ‘Invert.’ Tap on ‘Invert’.
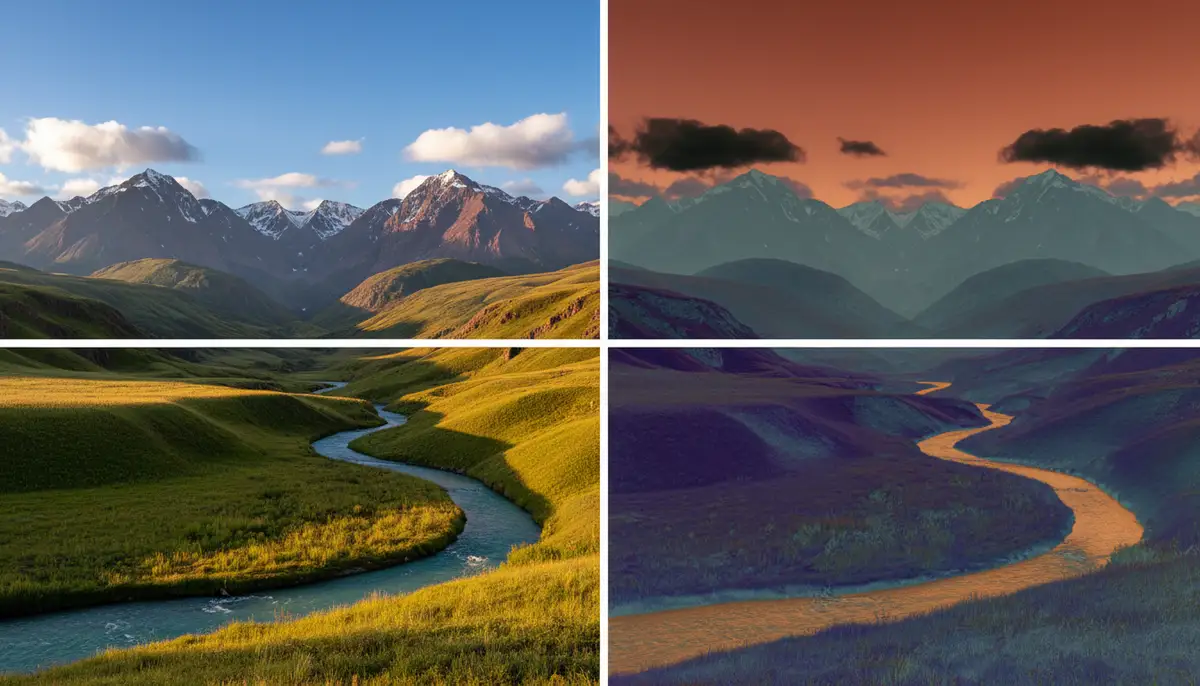
As soon as you tap ‘Invert,’ your photo will instantly transform. All the colors will flip to their complementary opposites, giving your image a completely new look. It’s often a dramatic change! For a deeper dive into unique color effects, you might find inspiration in creating a thermal picture using PicsArt’s tools, which often involves similar color manipulation techniques.
Fine-Tuning Your Inversion (Optional)
Sometimes, simply applying the ‘Invert’ effect is enough. However, PicsArt often allows for further adjustments. After tapping ‘Invert,’ you might see a slider or a gear icon appear. Tapping the ‘Invert’ icon a second time or using the slider can sometimes allow you to adjust the intensity of the effect or access additional options. Experiment with these controls to achieve your desired outcome.
Additionally, you can combine the invert effect with other tools. For instance, after inverting, you might want to adjust the brightness, contrast, or saturation. You can also use the ‘Erase’ tool to selectively remove the inverted effect from certain areas of your photo, creating a masked look. This level of control is what makes PicsArt so powerful for creative edits. To learn more about applying various effects, check out this tutorial on how to apply photo effects in PicsArt for advanced techniques.
Advanced Techniques for How to Invert Colors on PicsArt
Knowing the basic steps of how to invert colors on PicsArt is just the beginning. To truly elevate your photo editing, explore these advanced techniques that leverage the invert effect in creative ways.
Selective Inversion for Dramatic Effects
One of the most impactful ways to use color inversion is selectively. Instead of inverting the entire image, you can choose specific areas. After applying the ‘Invert’ effect, look for the ‘Erase’ icon (often a small eraser shape) at the top of the screen. Tapping this allows you to paint over parts of your image to remove the effect, or conversely, to apply it only to certain areas using the ‘Restore’ brush.
This technique is fantastic for creating surreal portraits where only the eyes are inverted, or for making a specific object pop with an inverted color scheme while the background remains normal. It adds depth and a focal point to your image, demonstrating a more sophisticated understanding of how to invert colors on PicsArt.
Combining Inversion with Other Filters
Don’t stop at just inversion! PicsArt allows you to layer multiple effects. After applying the ‘Invert’ filter, tap the checkmark to confirm it. Then, you can go back into the ‘Effects’ menu and add another filter. Imagine an inverted photo with a vintage film grain, or a vibrant inverted image with a subtle blur around the edges.
Experimentation is key here. Try combining ‘Invert’ with ‘Pop Art’ filters, ‘Sketch’ effects, or even different color overlays. Each combination will yield unique results, pushing the boundaries of your creativity. This layering approach truly expands what you can do when you invert colors on PicsArt.
Creating a “Thermal” or “Negative” Look
The inverted effect is the foundation for creating classic photo negative looks or even mimicking thermal imaging. A photo negative, in traditional photography, is an image where the colors and light values are reversed. The ‘Invert’ tool perfectly replicates this digital version. For a visual demonstration of creating a photo negative using editing sites, including PicsArt, watch this helpful video:
.
To get a ‘thermal’ look, you might apply the invert effect and then adjust the hue or add a color overlay, often in reds, oranges, and blues. This mimics the color gradients seen in thermal cameras. It’s a fantastic way to give your photos a scientific or futuristic edge, all starting with how to invert colors on PicsArt.
Inverting Colors for Specific Design Goals
Beyond artistic expression, color inversion has practical design applications. For instance, if you’re creating a poster and want a bold, contrasting background, inverting a textured photo can provide a unique base. It’s also useful for making elements stand out in graphic design projects.
Consider using inverted colors for social media graphics or website banners. The unexpected color scheme can grab attention immediately. If you’re looking for quick solutions to transform images for web use, you can also invert colors online directly through PicsArt’s web tools, which can be incredibly fast for simple tasks.
Common Challenges and Troubleshooting When You Invert Colors on PicsArt
While learning how to invert colors on PicsArt is generally smooth, you might encounter a few hiccups. Here’s how to address common issues and ensure your inverted masterpieces look their best.
Image Quality Issues
Sometimes, after inverting, an image might appear pixelated or lose detail. This usually stems from starting with a low-resolution photo. PicsArt, like any editor, can only work with the data it’s given. If your original image is small or blurry, inverting it won’t improve its sharpness.
Tips for Best Results:
- Always start with high-resolution images whenever possible.
- Avoid excessive zooming or cropping before applying effects, as this can degrade quality.
- Ensure good lighting in your original photo; inversion can sometimes exaggerate noise in dark areas.
Effect Not Applying Correctly
If you apply the ‘Invert’ effect and don’t see the expected change, or it only affects a small portion of your image, check a few things. First, ensure you haven’t accidentally activated a selection tool or mask. Sometimes, a previous edit might leave a selection active, limiting where new effects are applied.
Second, verify that your PicsArt app is up to date. Software bugs can sometimes prevent effects from rendering correctly. Keeping your apps updated is a good practice for optimal performance and access to new features. Just like you might want to know how to update Snapchat Android for the best experience, ensuring PicsArt is current helps avoid glitches.
Saving and Sharing Your Inverted Masterpiece
Once you’re happy with your inverted image, it’s time to save and share it. Look for the ‘Apply’ or checkmark icon, usually at the top right, to confirm your edits. Then, find the ‘Download’ or ‘Share’ icon (often an arrow pointing down or a share symbol). You can typically save the image to your device’s gallery or share it directly to social media platforms.
PicsArt offers various export options, including different file formats (like JPG or PNG) and quality settings. Choose the highest quality for printing or professional use, and a slightly lower quality for faster web uploads. Knowing how to invert colors on PicsArt also includes knowing how to properly export your work.
Creative Project Ideas Using Color Inversion
Now that you’re a pro at how to invert colors on PicsArt, let’s explore some exciting project ideas to spark your creativity. The invert effect is incredibly versatile and can be applied to a wide range of photographic styles.

Abstract Art and Surreal Landscapes
Transform mundane landscapes into otherworldly scenes. A sunny beach can become a mysterious, moonlit shore. A forest can turn into a vibrant, alien jungle. Inverting colors can instantly add a layer of surrealism to any photo, making it feel like it’s from another dimension. This is a fantastic way to experiment with abstract photography without needing complex setups.
- Invert photos of cityscapes at night for a futuristic, neon-drenched look.
- Apply inversion to close-ups of flowers or leaves to reveal hidden patterns and textures.
- Experiment with portraits, inverting only certain features like hair or clothing for a striking effect.
- Create unique backgrounds for graphic design by inverting abstract patterns or textures.
Spooky Halloween Effects
Color inversion is a go-to trick for creating eerie and unsettling visuals, perfect for Halloween. A normal portrait can become a ghostly figure, or a daytime scene can take on a sinister, nocturnal feel. Use it on photos of haunted houses, spooky costumes, or even carved pumpkins to amplify the creepy factor.
The reversed colors often mimic the look of old, decaying film or infrared photography, which naturally lends itself to horror aesthetics. Pair it with PicsArt’s sticker library for bats, ghosts, or spiderwebs to complete your spooky masterpiece. You’ll be amazed at how easily you can create chilling effects when you invert colors on PicsArt.
Pop Art and Graphic Design Elements
For a bold, pop art aesthetic, color inversion is incredibly effective. It creates high contrast and vibrant, unexpected color combinations that are reminiscent of classic comic books or Warhol-esque prints. You can take a simple object, invert its colors, and instantly give it a graphic, stylized look. This works especially well for product photography or creating eye-catching social media content.
| Original Color | Inverted Color (Approx.) | Typical Use Case |
|---|---|---|
| Red | Cyan | Warmth, Energy |
| Blue | Yellow | Coolness, Calm |
| Green | Magenta | Nature, Growth |
| White | Black | Purity, Darkness |
| Black | White | Mystery, Light |
When you invert colors on PicsArt for graphic design, consider how the new palette interacts with text and other design elements. The dramatic shift can make your designs more dynamic and memorable. It’s a simple yet powerful tool for graphic artists.
Beyond Inversion: Exploring Other Powerful PicsArt Features
While learning how to invert colors on PicsArt is a fantastic skill, remember that PicsArt is a comprehensive editing suite. It offers a vast array of tools beyond simple effects. You can use its robust editing tools to crop, resize, adjust exposure, and correct colors. The app also features drawing tools, collage makers, and a massive library of stickers and fonts.
For those serious about mobile photography, exploring all of PicsArt’s capabilities is highly recommended. Similarly, apps like Camera ZOOM FX offer professional controls and stunning filters for high-quality results directly from your Android device. It’s all about finding the right tools for your creative vision. Understanding your camera’s capabilities, like how to check shutter count, can also enhance your overall photography workflow, ensuring you start with the best possible raw material.
The Future of Photo Editing: What’s Next for Inverting Colors on PicsArt?
The landscape of photo editing is constantly evolving, driven by advancements in AI and machine learning. We can expect even more sophisticated tools in PicsArt and other platforms like Afterlight and Snapseed. Imagine AI-powered selective inversion that intelligently identifies objects or subjects, allowing for even more precise and effortless application of the invert effect.
New effects that seamlessly blend inverted and normal colors, or dynamic inversion based on image content, are likely on the horizon. The core function of how to invert colors on PicsArt will remain, but the ways we interact with and enhance that effect will undoubtedly become more intuitive and powerful. Keeping up with updates will ensure you always have the latest creative options at your fingertips.
Conclusion
You now have a comprehensive understanding of how to invert colors on PicsArt. From the basic steps of finding the ‘Invert’ effect to advanced techniques like selective inversion and creative combinations, you’re equipped to transform your photos in exciting new ways. This simple yet powerful tool can unlock a world of artistic possibilities, allowing you to create surreal, dramatic, and uniquely styled images.
Don’t be afraid to experiment. Play with different photos, combine inversion with other filters, and explore the masking tools. The more you practice, the more intuitive the process will become, and the more stunning your results will be. So go ahead, open PicsArt, and start inverting! If you’re looking to capture those perfect shots before editing, consider exploring tools like a steady shot stabilizer to ensure your base images are always pristine.