Unlocking Creative Potential: How to Add Photos to Procreate Seamlessly
Procreate has become an essential tool for digital artists worldwide. Its intuitive interface and powerful features make it a favorite for sketching, painting, and illustration. A core part of many artists’ workflows involves bringing external images into their projects. Understanding exactly how to add photos to Procreate is crucial for blending photography with digital art. This guide will walk you through every method, ensuring you can integrate images into your Procreate canvases with ease. Whether you’re using photos for reference, textures, or as part of a composite piece, mastering this skill will significantly enhance your creative process. Let’s dive into the various ways you can incorporate your visual assets.
Why Learn How to Add Photos to Procreate?
Adding photos to Procreate isn’t just about placing an image on a canvas. It opens up a world of possibilities. You can use photos as a base for tracing, a source for color palettes, or as textures to add depth to your artwork. Photobashing, a popular technique, heavily relies on importing multiple images to quickly build complex scenes. For illustrators, reference photos are invaluable for getting anatomy, perspective, or lighting just right. Knowing how to add photos to Procreate quickly and efficiently saves time and expands your artistic toolkit. It allows you to experiment freely, combining real-world elements with your digital creations. This flexibility is what makes Procreate so powerful for artists of all levels.
Method 1: Direct Import from the Photos App
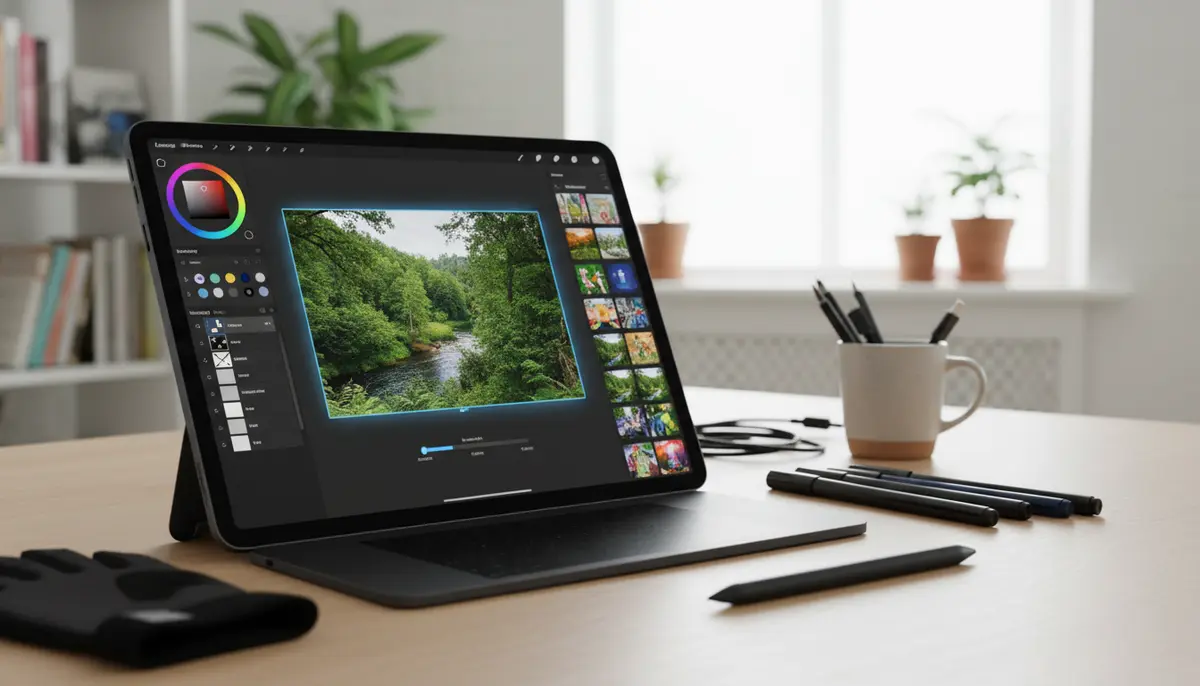
The most common and straightforward way to add photos to Procreate is directly from your iPad’s Photos app. This method is perfect for bringing in images you’ve captured with your device or saved from other sources. It’s quick, simple, and integrates perfectly with your existing photo library. This is often the first technique artists learn when they begin exploring how to add photos to Procreate. Let’s break down the steps.
Step-by-Step: Inserting a Photo from Your Library
- Open Procreate and either create a new canvas or open an existing artwork.
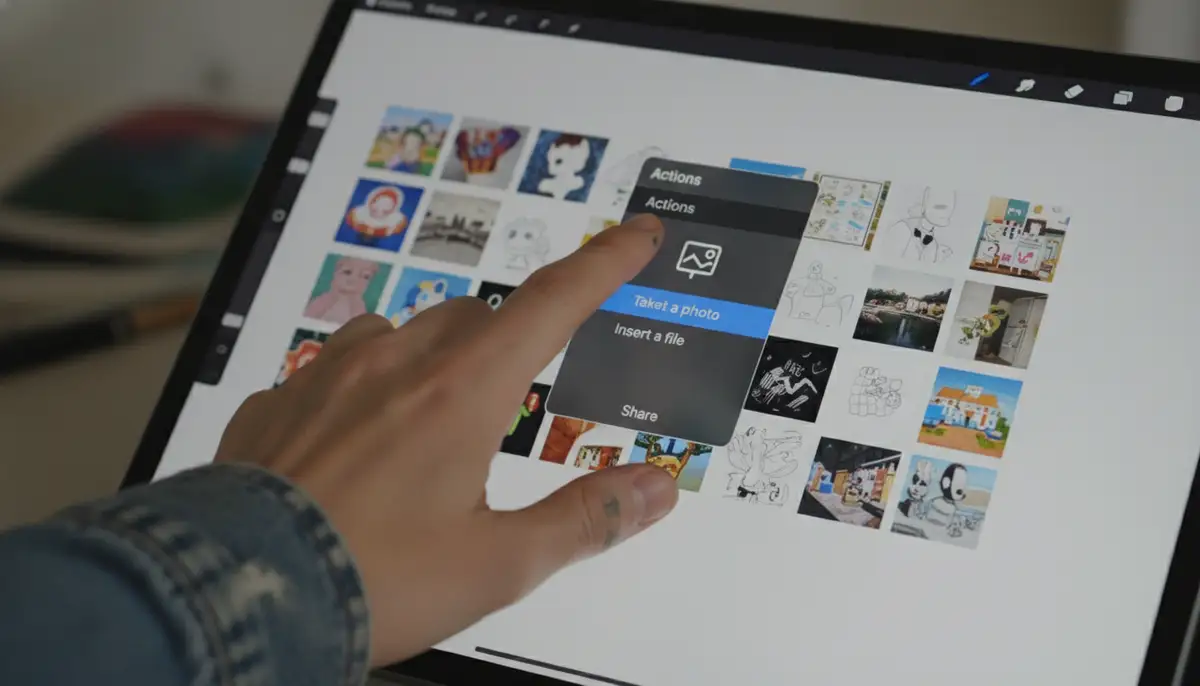
- Tap the ‘Actions’ icon in the top-left corner of your interface. This icon looks like a wrench.
- In the Actions menu, ensure you are on the ‘Add’ tab. This tab is usually selected by default.
- Tap ‘Insert a photo’. This action will open your iPad’s Photos app library.
- Browse through your albums or use the search bar to find the photo you wish to import.
- Tap on the desired photo. It will instantly appear on your Procreate canvas.
- Use the Transform tool (the arrow icon) to move, scale, or rotate your photo into position. Once satisfied, tap the Transform icon again to commit the changes.
It’s really that simple! Once the photo is on your canvas, Procreate automatically places it on a new layer. This keeps your original artwork separate and untouched. You can then adjust its opacity, blend mode, or use it as a reference. For more detailed information on this process, you can always refer to the official Procreate Handbook on Actions. This resource provides a comprehensive overview of all the actions available within Procreate, including how to add photos to Procreate effectively.
Method 2: Importing from the Files App
Sometimes, your photos aren’t stored directly in your Photos app. They might be in iCloud Drive, Dropbox, Google Drive, or on your iPad’s ‘On My iPad’ location. For these situations, the Files app is your go-to solution. This method offers greater flexibility for accessing images from various cloud services and local storage. It’s an important technique to learn when considering how to add photos to Procreate from diverse sources. The Files app supports a wider range of file types too, including PSDs.
Accessing Images from Cloud Services and Local Storage
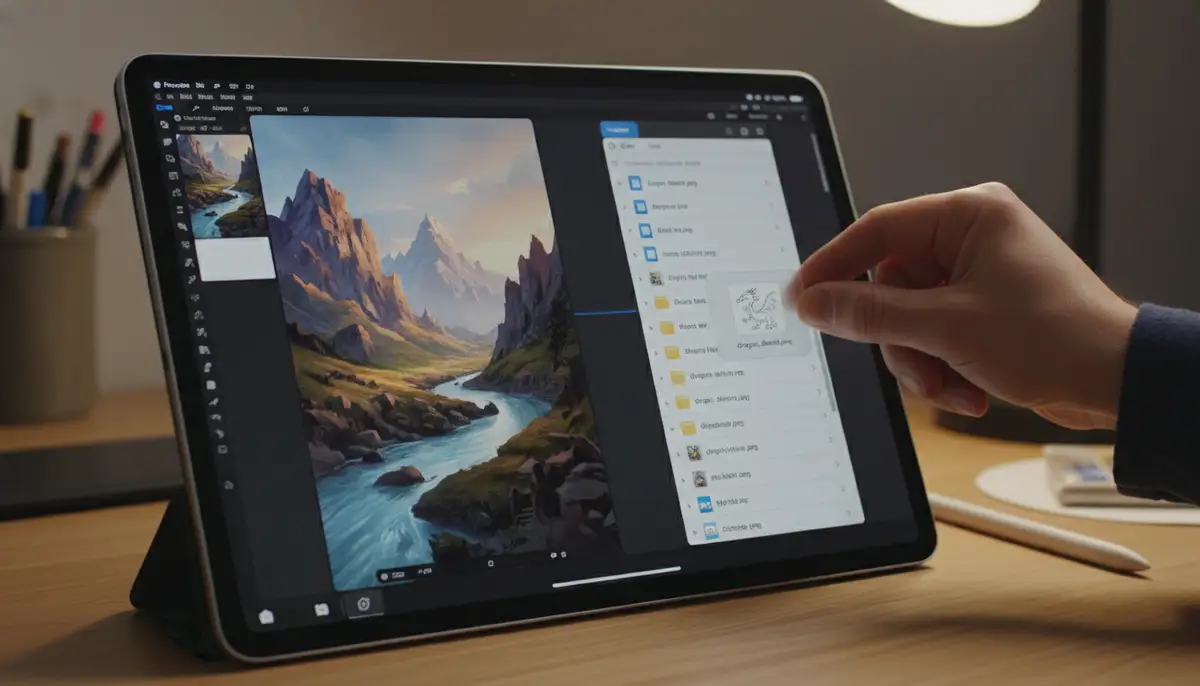
- Start in Procreate with your canvas open.
- Tap the ‘Actions’ icon (wrench symbol) in the top-left corner.
- Go to the ‘Add’ tab within the Actions menu.
- This time, tap ‘Insert a file’. This will open the Files app interface.
- Navigate through your Files app. You’ll see options like ‘Recents’, ‘iCloud Drive’, ‘On My iPad’, and any connected third-party cloud services (e.g., Dropbox, Google Drive, OneDrive).
- Locate and tap the image file you want to import. Procreate will place it on your canvas.
- Adjust the photo’s position, size, and rotation using the Transform tool, then commit the changes.
Using the Files app is particularly useful for importing complex files like layered PSDs that you might have prepared in Photoshop or other professional software. This ensures that you maintain full control over your assets, even when moving between different applications. It’s a key part of understanding how to add photos to Procreate for a professional workflow. For more details on importing various image types, the Procreate team offers excellent guidance on importing images into your artwork.
Supported File Types for Import
Procreate is quite versatile when it comes to the file types it supports. This is a huge advantage for artists who work with various formats. Knowing what you can import helps you prepare your files correctly before you even consider how to add photos to Procreate. Here’s a quick overview of common file types you can bring in:
| File Type | Description | Common Use Cases |
|---|---|---|
| JPEG (.jpg, .jpeg) | Standard compressed image format, good for photos. | Reference images, backgrounds, textures. |
| PNG (.png) | Supports transparency, lossless compression. | Logos, cut-out elements, overlays. |
| PSD (.psd) | Photoshop document, supports layers and editable elements. | Complex layered artwork, assets from other design software. |
| TIFF (.tif, .tiff) | High-quality, lossless image format. | Print-ready images, high-fidelity textures. |
| GIF (.gif) | Supports animation, limited color palette. | Simple animations (though Procreate handles animation differently), small graphics. |
| PDF (.pdf) | Portable Document Format, can contain images and text. | Importing scanned documents or multi-page references. |
This wide range of supported formats means you rarely have to convert files before you add photos to Procreate. This streamlines your workflow significantly. Always ensure your files are optimized for performance, especially if you’re working with very large images.
Method 3: Drag and Drop (iPadOS Feature)
For those who prefer a more fluid and direct interaction, iPadOS’s drag-and-drop feature is a game-changer. This method allows you to literally grab an image from another app and drop it right onto your Procreate canvas. It’s incredibly intuitive and speeds up your workflow, especially when working with multiple reference images or elements. This is a very efficient way to understand how to add photos to Procreate quickly. It leverages the multitasking capabilities of your iPad.
Utilizing Split View and Slide Over for Seamless Integration
- Open Procreate with your desired canvas.
- From the iPad’s Dock, drag another app’s icon (like Photos or Files) to the side of the screen to activate Split View or Slide Over.
- Once the second app is open alongside Procreate, navigate to the image you want to import.
- Tap and hold the image until it ‘lifts’ from its original location.
- Drag the image directly over to your Procreate canvas.
- Release your finger. The image will appear on a new layer in Procreate.
- Use the Transform tool to adjust its size and position as needed.
The drag-and-drop method is particularly useful when you’re gathering inspiration or elements from various sources. You can quickly pull images from Safari, a mood board app, or your Photos library without breaking your creative flow. This method is a testament to the power of iPadOS and how it enhances applications like Procreate. It truly simplifies how to add photos to Procreate for a dynamic workflow. For users with Procreate Pocket, the process is slightly different but equally intuitive, often involving a ‘Modify > Actions > Add > Insert a photo’ sequence, as detailed in the Procreate Pocket Handbook.
Advanced Techniques for Photo Integration in Procreate
Knowing the basic methods for how to add photos to Procreate is just the beginning. Procreate offers a wealth of tools to manipulate and integrate these photos into your artwork seamlessly. Let’s explore some advanced techniques that will take your digital art to the next level. These methods allow for more creative control and complex compositions.
Working with Multiple Photos and Layers
You’re not limited to just one photo per canvas. You can import as many as your iPad’s memory and Procreate’s layer limits allow. Each imported photo automatically gets its own layer. This is a fundamental aspect of how to add photos to Procreate for complex projects. Managing these layers is key to maintaining an organized artwork. Use the Layers panel to rename, group, and rearrange your photo layers. This keeps your project tidy and easy to navigate, especially when dealing with many elements.
Reference Layers and Tracing
Many artists use imported photos as reference. To do this effectively, import your photo and then reduce its layer opacity. This makes it easier to draw over without being distracted by the photo’s full color and detail. You can even set the photo layer as a ‘Reference’ layer. This allows you to pick colors from it even when drawing on a different layer. This is a fantastic way to learn how to add photos to Procreate for accurate studies or tracing.
Clipping Masks and Alpha Locks
These powerful features allow you to apply effects or paint only within the bounds of another layer. If you import a photo and want to add texture or color to it without going outside its edges, use a Clipping Mask. Create a new layer above your photo layer, tap it, and select ‘Clipping Mask’. Now, anything you draw on this new layer will only show up where the photo layer has content. Alpha Lock works similarly but directly on the photo layer itself. Tap the photo layer and select ‘Alpha Lock’. Now, you can only paint on the existing pixels of that photo layer. These techniques are essential for refined photo manipulation after you learn how to add photos to Procreate.
Blending Modes for Creative Effects
Blending modes change how a layer interacts with the layers below it. Procreate offers a wide array of blending modes, such as Multiply, Screen, Overlay, and Soft Light. Experiment with these after you add photos to Procreate. For instance, ‘Multiply’ can darken and combine colors, great for shadows or texture overlays. ‘Screen’ can lighten and brighten, useful for light effects. Playing with blending modes can transform a simple photo into an integrated part of your digital painting. This allows for unique visual effects and deeper integration.
Troubleshooting Common Issues When You Add Photos to Procreate
Even with a smooth workflow, you might occasionally encounter issues when you add photos to Procreate. Don’t worry, most problems have simple solutions. Being prepared for these common hiccups will save you time and frustration. Let’s look at some frequent issues and how to resolve them.
Image Quality and Resolution
If your imported photo looks pixelated or blurry, it’s likely a resolution issue. Procreate works best with high-resolution images. If you’re importing a small image and scaling it up significantly, it will lose quality. Always try to use the highest resolution source image available. Also, check your canvas resolution before importing. A low-resolution canvas will limit the quality of any image you add to it. Consider creating larger canvases if you plan to incorporate detailed photos. This ensures your final artwork maintains crispness.
File Size Limits and Performance
Very large image files can impact Procreate’s performance and reduce the number of available layers. If Procreate feels sluggish after you add photos to Procreate, check the file size of your imported images. You might need to resize them in another app before importing, or consider breaking down your artwork into multiple Procreate files. Remember, your iPad’s RAM also plays a role in performance. Older iPads might struggle with extremely large canvases and many high-resolution layers. Optimizing your files is a good habit.
Missing Photos or Import Errors
If you can’t find a photo in your Photos app or Files app, double-check its location. Ensure it’s not in a deleted folder or an unsupported cloud service. Sometimes, a quick restart of Procreate or your iPad can resolve minor glitches. Also, verify that Procreate has permission to access your Photos or Files. You can check this in your iPad’s Settings app under ‘Procreate’. Granting these permissions is crucial for successful imports.
For more visual learners, there’s an excellent resource available. You can watch
on YouTube. This video provides a detailed walkthrough of importing photos and offers valuable tips and tricks to avoid common pitfalls. It’s a great complement to this written guide on how to add photos to Procreate.
Optimizing Your Workflow for Efficiency
Efficiency is key in any creative process. When you frequently add photos to Procreate, having an optimized workflow can save you hours. Here are some tips to streamline your process and make photo integration as smooth as possible. These strategies help you work smarter, not harder.
Organizing Your Source Images
Before you even open Procreate, organize your photos. Create dedicated albums in your Photos app or specific folders in the Files app for each project. Naming your files clearly also helps. This makes it incredibly easy to find the exact image you need when you go to add photos to Procreate. A well-organized library means less time searching and more time creating. Consider using tags or keywords within your photo library for even faster retrieval.
Utilizing Quick Menu and Gestures
Procreate’s Quick Menu is customizable. You can assign ‘Insert a photo’ or ‘Insert a file’ to a gesture or a tap. This allows for lightning-fast access without navigating through menus. Similarly, learn the various touch gestures for transforming layers. Pinching to scale, rotating with two fingers, and dragging to move are all intuitive. Mastering these gestures speeds up the post-import adjustment process significantly. This contributes to a smoother experience when you add photos to Procreate.
Batch Importing and Pre-processing
While Procreate doesn’t have a direct ‘batch import’ feature in the traditional sense, you can use the drag-and-drop method to bring in multiple images quickly. Select several photos in your Photos or Files app and drag them all at once. Procreate will import each as a separate layer. For pre-processing, consider using a dedicated photo editing app to crop, resize, or make basic color corrections before you add photos to Procreate. This ensures your images are ready to go and reduces the need for extensive edits within Procreate itself. This is especially useful for maintaining consistency across multiple images.
Beyond Basic Import: Creative Uses for Photos in Procreate
Once you’ve mastered how to add photos to Procreate, the real fun begins. Photos aren’t just for reference; they can be integral parts of your artwork. Let’s explore some exciting creative applications that push the boundaries of digital art. These techniques leverage the versatility of imported images.
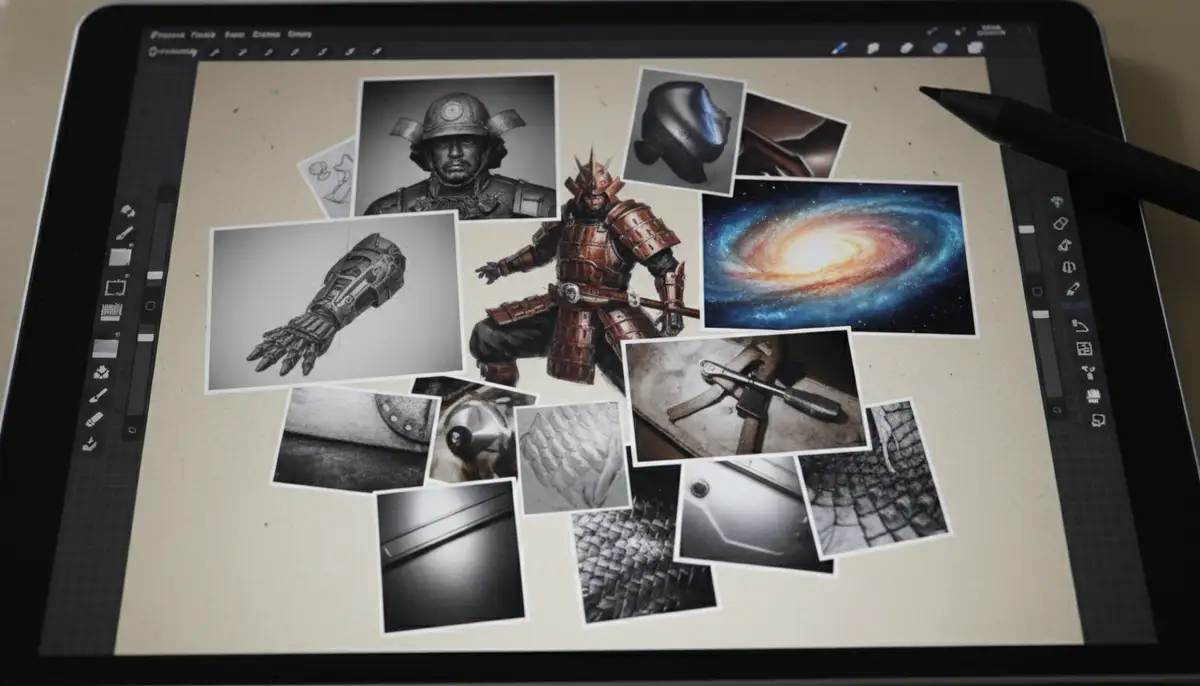
Photobashing and Composition
Photobashing involves combining various photographic elements to create a new, often fantastical, scene. Import multiple photos, cut out elements, adjust perspectives, and use blending modes to seamlessly integrate them. This technique is popular in concept art for quickly visualizing ideas. It’s a powerful way to build complex environments or characters from disparate sources. Mastering how to add photos to Procreate for photobashing is a valuable skill for concept artists and illustrators.
Creating Custom Textures and Brushes
Photos of interesting textures (wood grain, rust, fabric, clouds) can be invaluable. Import them, adjust their contrast, and use them as texture overlays with blending modes. Even more advanced, you can use parts of photos to create custom Procreate brushes. By defining a brush shape or grain from a photo, you can replicate unique textures in your digital paintings. This adds a personalized touch to your artwork that generic brushes can’t provide. This shows the depth of how to add photos to Procreate for bespoke artistic tools.
Digital Painting Over Photos
Many artists start with a photo and paint directly over it, enhancing details, adding stylistic elements, or transforming it entirely. This is a hybrid approach that combines the realism of photography with the expressiveness of painting. It’s a fantastic way to practice digital painting while working from an existing base. This technique is often used for digital portraits or stylized landscapes. It is a creative application of how to add photos to Procreate.
Leveraging High-Quality Source Photos
The quality of your final Procreate artwork often depends on the quality of your source images. Using a powerful photography app like Camera ZOOM FX can help you capture stunning photos with professional controls and filters. These high-quality images then become perfect assets when you need to add photos to Procreate. Whether it’s for detailed textures or crisp reference, starting with excellent photography makes a significant difference. Our app helps you take stunning photos that will elevate your Procreate projects.
Comparing Procreate’s Import Features with Other Industry Solutions
While Procreate excels in many areas, it’s helpful to understand its place in the broader ecosystem of creative apps. Companies like PicsArt, VSCO, and Afterlight offer robust photo editing and creative tools, often with their own methods for integrating images. These platforms might focus more on filters, collage, or social sharing. However, when it comes to deep integration for digital painting and illustration, Procreate’s layer management, brush engine, and intuitive interface for how to add photos to Procreate truly shine. It’s designed from the ground up for artists, making it a powerful choice for those who want to transform images rather than just edit them. While other apps might offer quick edits, Procreate provides the canvas for true artistic transformation. For instance, if you’re interested in device maintenance for other apps, you might find our guide on how to update snapchat android useful for keeping your other creative tools running smoothly.
Final Thoughts on How to Add Photos to Procreate
Mastering how to add photos to Procreate is a fundamental skill for any digital artist using the app. From simple reference images to complex photobashed compositions, the ability to seamlessly integrate external visuals expands your creative horizons dramatically. We’ve covered the primary methods: direct import from the Photos app, using the versatile Files app, and the efficient drag-and-drop technique. Additionally, we explored advanced layer manipulation, blending modes, and creative applications that transform mere photos into integral parts of your artwork. Remember to organize your source images, optimize for performance, and experiment with all the tools Procreate offers. The more you practice, the more intuitive the process becomes. Keep exploring and pushing your creative boundaries. And just as you optimize your digital art workflow, it’s also important to understand the lifespan of your creative tools. For photographers, this might mean learning how to check shutter count on their cameras, ensuring their equipment is ready for capturing those perfect reference shots. Happy creating!